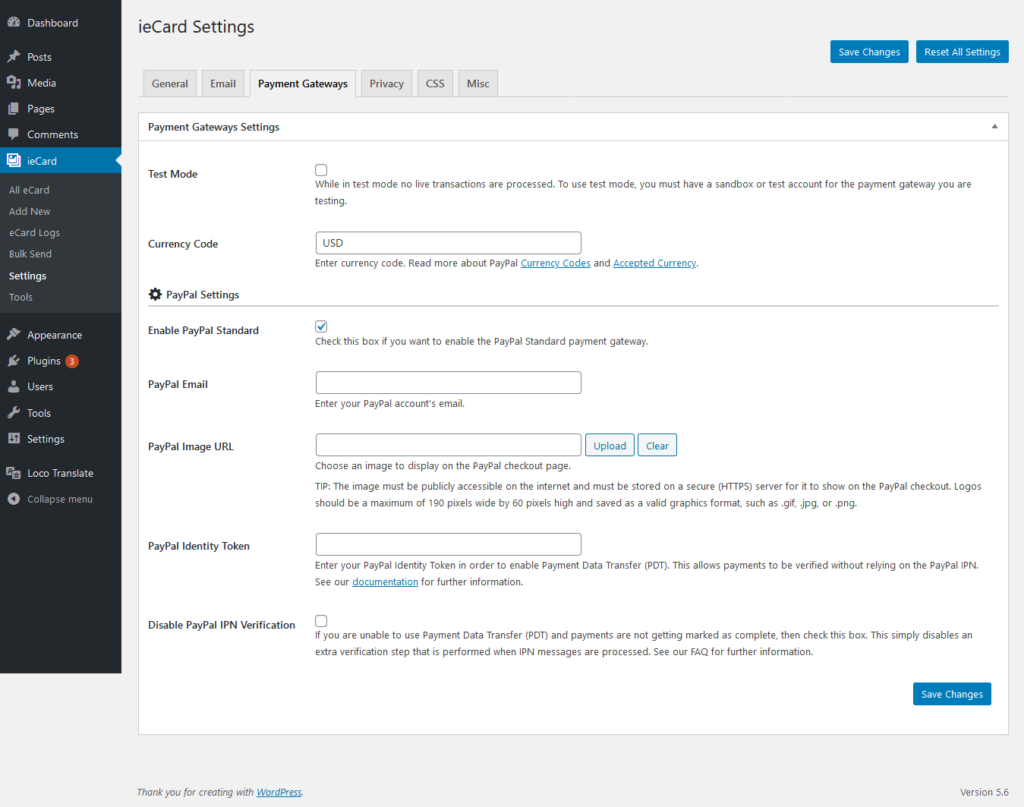
Payment Gateways Settings holds the payment related settings like PayPal for the ecard.

Test Mode
Check the box if you want to test ecard payment process in test payment gateway. While in test mode no live transactions are processed. To use test mode, you must have a sandbox or test account for the payment gateway you are testing.
Currency Code
Enter currency code in which you want to get payment. Read more about PayPal Currency Codes and Accepted Currency.
Enable PayPal Standard
Check the box if you want to enable the PayPal Standard as payment gateway for eCard.
PayPal Email
Enter the PayPal account’s email address. This is the address associated with your PayPal account.
PayPal Image URL
Choose an image to display on the PayPal checkout page.
TIP: The image must be publicly accessible on the internet and must be stored on a secure (HTTPS) server for it to show on the PayPal checkout. Logos should be a maximum of 190 pixels wide by 60 pixels high and saved as a valid graphics format, such as .gif, .jpg, or .png.
If you do not have an SSL on your site, I would suggest not adding an image to your checkout page layout. If you specify an image that is not loaded over the https protocol, your customer’s web browser might show a message that says the payment page contains non-secure items.
PayPal Identity Token
Enter your PayPal Identity Token. This is required in order for payment records to be automatically marked as Complete immediately after purchase.
This token can be obtained from your PayPal account by following these steps:
- Log in to your PayPal account.
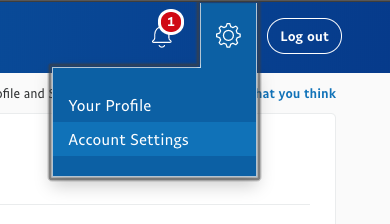
- Hover over the cog in the upper right corner of the screen and select Account Settings.
- Under the Products & Services heading, click on Website payments on the left side of the screen.
- Click the Update link next to Website Preferences.
- Set Auto Return to On.
- For the return URL, enter your website URL.
- In Payment Data Transfer, click the On option.
- Click Save.
- Your PDT identity token should now be visible in the Payment Data Transfer section on the page.
- Copy the token and paste it into the PayPal Identity Token field in Plugin → Settings → Payment Gateways.
Disable PayPal IPN Verification
If the PayPal IPN is not working, you can disable IPN verification, which simply disables an extra verification step that is performed when IPN messages are processed.
IPN Settings
The PayPal Instant Payment Notification (IPN) service allows PayPal to communicate with your store, and mark transactions as complete, failed and etc.
The PayPal IPN will be configured automatically when using PayPal Standard but it is still important you can confirm it is enabled inside your PayPal account.
NOTE: PayPal IPN verification requires an SSL certificate. As of September 30, 2016, PayPal IPN will ONLY work over SSL.
Log into your PayPal account and hover over the cog in the upper right corner of the screen, then select Account Settings.

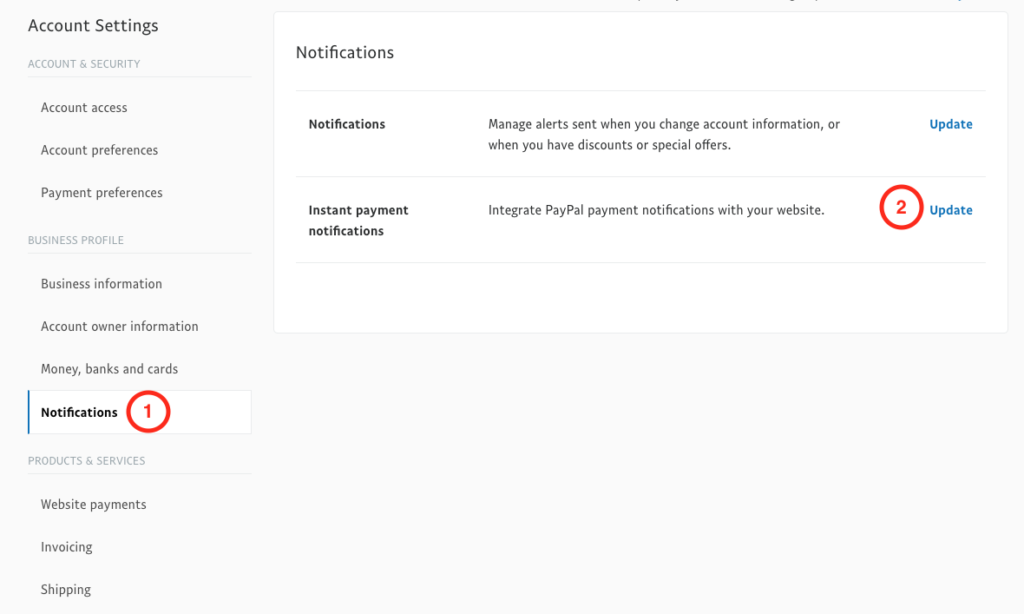
Click Notifications on the left side of the screen, then click Update next to Instant Payment Notifications.

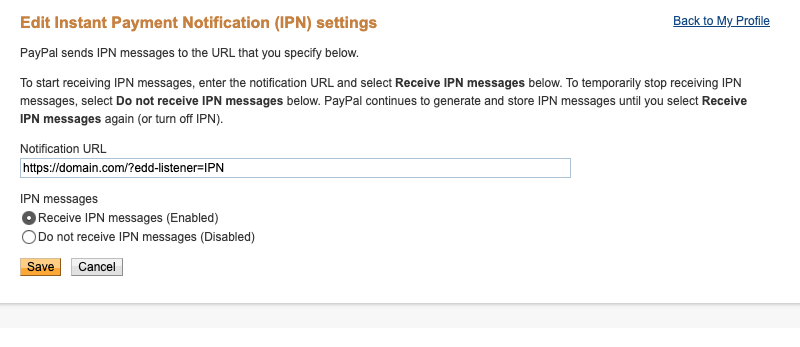
Click the Edit Settings button, then enter your website URL. Choose the radio button for Receive IPN messages (Enabled).

If you need to access your PayPal IPN history, see this guide.
